En Linux hay varios métodos de convertir un disco duro a un disco duro virtual para utilizarlo en VirtualBox o VMWare.
En esta entrada lo vamos a hacer con TestDisk

Instalación TestDisk
comandoit@comandoit:~# apt-get install testdisk
Si no lo tienes en tus repositorios, te lo puedes descargar de su página oficial:
Tambien es compatible con WIndows.
Repositorio Oficial de TestDisk
Una vez instalada la aplicación
Seleccionamos el disco duro que en este caso es el «>Disk /dev/sdd – 80 GB / 74 GiB – WDC WD80 0BEVS-22RST0» :
comandoit@comandoit:~# testdisk
TestDisk 7.1, Data Recovery Utility, July 2019
Christophe GRENIER <grenier@cgsecurity.org>
https://www.cgsecurity.org

  TestDisk is free software, and
comes with ABSOLUTELY NO WARRANTY.

Select a media (use Arrow keys, then press Enter):
 Disk /dev/sda - 120 GB / 111 GiB - KINGSTON SHFS37A120G
 Disk /dev/sdb - 1000 GB / 931 GiB - ST1000DM005 HD103SJ
 Disk /dev/sdc - 1000 GB / 931 GiB - TOSHIBA DT01ACA100
>Disk /dev/sdd - 80 GB / 74 GiB - WDC WD80 0BEVS-22RST0

>[Proceed ]  [  Quit  ]
Seleccionamos el sistema de ficheros que tiene el disco duro en el que vamos a hacer la imagen, normalmente seleccionamos por defecto «[Intel ]«
TestDisk 7.1, Data Recovery Utility, July 2019
Christophe GRENIER <grenier@cgsecurity.org>
https://www.cgsecurity.org


Disk /dev/sdd - 80 GB / 74 GiB - WDC WD80 0BEVS-22RST0

Please select the partition table type, press Enter when done.
>[Intel  ] Intel/PC partition
 [EFI GPT] EFI GPT partition map (Mac i386, some x86_64...)
 [Humax  ] Humax partition table
 [Mac    ] Apple partition map (legacy)
 [None   ] Non partitioned media
 [Sun    ] Sun Solaris partition
 [XBox   ] XBox partition
 [Return ] Return to disk selection
Seleccionamos mediante el teclado la opción «[ Advanced ]«
TestDisk 7.1, Data Recovery Utility, July 2019
Christophe GRENIER <grenier@cgsecurity.org>
https://www.cgsecurity.org


Disk /dev/sdd - 80 GB / 74 GiB - WDC WD80 0BEVS-22RST0
     CHS 9729 255 63 - sector size=512

 [ Analyse  ] Analyse current partition structure and search for lost partitions
>[ Advanced ] Filesystem Utils
 [ Geometry ] Change disk geometry
 [ Options  ] Modify options
 [ MBR Code ] Write TestDisk MBR code to first sector
 [ Delete   ] Delete all data in the partition table
 [ Quit     ] Return to disk selection
Una vez elegida la partición del disco duro, seleccionamos [Image Creation]
TestDisk 7.1, Data Recovery Utility, July 2019
Christophe GRENIER <grenier@cgsecurity.org>
https://www.cgsecurity.org

Disk /dev/sdd - 80 GB / 74 GiB - CHS 9729 255 63

     Partition                  Start        End    Size in sectors
> 1 * HPFS - NTFS              0  32 33  9729  78 13  156299264


 [  Type  ]  [  Boot  ]  [  List  ]  [Undelete] >[Image Creation]  [  Quit  ]
                                Create an image
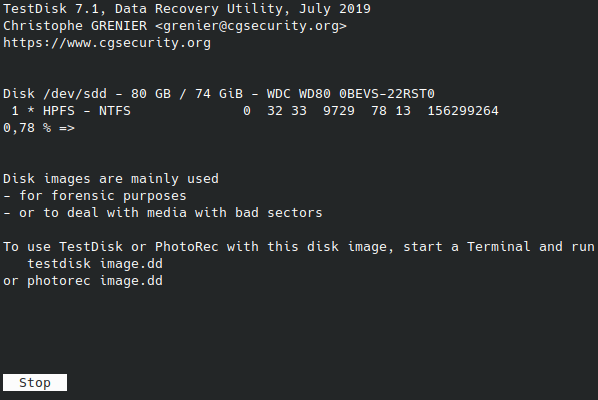
En el siguiente paso deberemos elegir el directorio correcto donde queramos guardar la imagen, en mi ejemplo la imagen tiene un tamaño de 80 GB:
TestDisk 7.1, Data Recovery Utility, July 2019

Please select where to store the file image.dd (80025 MB), an image of the
partition
Keys: Arrow keys to select another directory
      C when the destination is correct
      Q to quit
Directory /home/ideaskz/Descargas/testdisk-7.2-WIP
>drwxr-xr-x  1000  1000      4096 13-Oct-2022 10:16 .
 drwxr-xr-x  1000  1000      4096 11-Oct-2022 16:06 ..
En la creación de la imagen es el paso que más tarda, así que ten paciencia.

Una vez finalizada nuestra imagen, vamos a proceder a convertirla para que VirtualBox pueda usarla, con el comando «VBoxMange convertdd«
comandoit@comandoit:~# VBoxManage convertdd /image_hdd/image.dd /Images_hdd/image.vdi --format VDI
Converting from raw image file="/image_hdd/image.dd" to file="/image_hdd/image.dd /Images_hdd/image.vdi"...
Creating dynamic image with size 80025223168 bytes (76318MB)...
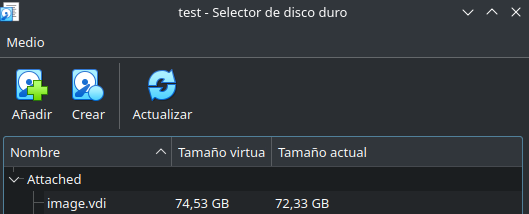
Una vez generada, tan solo debemos asociarla con VirtualBox:


